One of the issues I recognized is that the TLC LED Driver can receive a serial signal (SPI) at 30MHz, but the PIC24 can only spit out SPI at 10MHz, this is something I didn't realize at the start because the PIC24 runs at 40MHz. I thought its SPI would run closer to that, it was only when I started playing with the SPI modules that i realized it didn't.
So, I was searching for options, if the TLC can receive at 30MHz, there must be something that can provide that, but I had no idea what. I suspect FPGAs probably do it, but I still have very little idea what they even are so that option's out. :) So the obvious thing seemed to look at what else PIC had to offer I notice their "top of the range" offerings, the PIC32, these chips are 32bit, 80MHz and can run SPI at 25MHz, not quite 30, but close enough! One BIG advantage of sticking with PIC is that the development is vary similar. I shouldn't have to relearn everything from scratch to port my program.
However there are several problems with stepping up to PIC32. Firstly and maybe most importantly, my "programmer" the Pickit2 which cost me, from memory, about $60, is not compatible with PIC32. Secondly, the silicon it self is considerably more expensive. Where as the AVRs I started on were in the $7 range, I could just about eat them for breakfast. The PIC24 were in the $15 range so still reasonable, not outrageous to buy 2 at a time, the PIC32s are more in the $30 range, so it's really time to start considering it carefully.
The bare chips however are surface mounted, which is not good if you aren't into SMT like me. Also you need a higher range programmer such as the ICD2 which is almost AU$250.. A good investment if you plan on doing a lot of projects, not so great if you plan on doing one or two.
Fortunately there is another alternative which is fairly decent for a hobbyist like me and that's what they call the "started kits". Basically you get a chip on a board, all wired up and hooked up and everything, but the really great thing is it has an extra preprogrammed microcontroller on it which acts as a debugger so you can program and debug the main chip with just a USB cable! There are a few options of these starter kits, with the basic one, which is still quite awesome, costing something in the order of $60. It's a lot smaller then I thought from the pictures on the microchip sites.

Unfortunately that's not quite all. This starter kit, all it has is a crappy high density socket on the bottom! I don't even have a clue what it's called.

The only way I've figured out that you can interface with this sucker is if you buy the "I/O Expansion Board" which sets you back another $80ish. So in all you have to fork out something like $150, which is still a hefty investment. BUT there are a couple of really great things about this, it's all factory mounted, so you don't have to worry about power, crystals, caps, programs sockets or anything like that, there are even 3 surface switches and LEDs which I definitely intend on using in my application, plus a couple of other great conveniences like probe points and a power socket.

So yeah, if you were going to be making heaps of projects and you etch your own boards and you solder SMT components blind folded, this is probably a bad way to go. But if you have one big labor of love project, and you need lots of processor power and you aren't great at SMT, then this is a really great option.
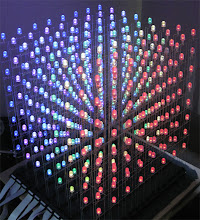
This is what it looks like all attached. The grid in the background of all these pictures is 1cm.

All the info and more about these products can of course be found on the microchip.com site.
So I'm not pretending I don't have quite a bit of work to do now, to port my stuff and learn about this new platform so I can get it all going again, but hopefully with the new power and flexibility, I'll get somewhat closer to completing this thing.
One last great thing is that all the starter kits are pin compatible, so even if i start with the basic one, and I want to buy the souped up usb starter kit II, which is about $80 and has the top of the line PIC32 chip on it, all I'll have to do is plug it in!
And if it needs saying, I am in no way affiliated with microchip.

Vespine, I came across your project several weeks ago after making the pretty random decision that I "needed" to build an LED cube. I pretty much dove right in, and am taking the "learn as I go route".
ReplyDeleteI wanted to thank you for documenting your work. I have read a *LOT* on microcontrollers, LED's, multiplexing, et. all over the past several weeks, and as far as LED cubes go, you have definitely set yourself apart as far as documenting and sharing both your triumphs and setbacks.
I'm just now starting to get moderately comfortable with an Arduino / Atmel. I was trying to mentally block out the fact that you weren't able to make it dance. I figured at some point I'd need to follow your lead and move to PIC. Your latest entry here seems to solidify that. I've been wondering (strictly at an undeducated, conceptual level) if I might be able to segment things and and string several Atmels together via I2C to split out the load enough to where they can handle the refresh rate... and somehow keep them in sync... I dunno, it's beyond my current knowledge set, so I still have lots of tinkering to do. I'd probably do myself a favor by moving on to PIC now though. :)
Anyway, I just wanted to thank you for sharing and wish you good luck! You've done awesome work so far!
I'm trying to keep my progress online too... http://www.photosbyjasonsmith.com/electronics if you get bored. :)
Take care,
Jason